Showing posts with label decor. Show all posts

Wednesday, November 13, 2013

Decorating for Thanksgiving

My work week begins tonight, so I spent last night doing crafty things and decorating for fall. Yes, fall. I guess really more like Thanksgiving, if you want to get technical. I have many friends who have already decorated for Christmas. Don't get me wrong, I LOVE Christmas. But I feel like the time between asking strangers for candy and telling Santa about all the things you want is quite overlooked. 

And there's so much to be thankful for… Friends & family. Football is in full swing (although I wish my Sooners would play). NBA is revving up. Starbucks has red cups. I got to go to Zumba last night. And then tried out some Ballet Beautiful. Edy's has there slow churned egg nog ice cream out. It's appropriate to wear sweaters, boots & scarves. And I know there are many, many other things…but I've been awake since 11 AM yesterday… 

So, decorating for Thanksgiving. I obviously hit up Pinterest for some inspiration. I checked out Hobby Lobby, but they literally have like 1/2 an aisle for fall. The rest is Christmas. I knew I wanted to get a couple candlestick things to set little pumpkins on. There were a couple I liked at Hobby Lobby, but even 1/2 off, they were $15-$20/each. I found these at a thrift store for $2:


Ugly as all get out, but paint can do a lot of things.


And, of course, there were no little pumpkins left at Hobby Lobby. I found these at home. Apples & pears are fall-ish fruits, right? I got some supplies to make a banner for the mantel. I already had paint & twine at home!
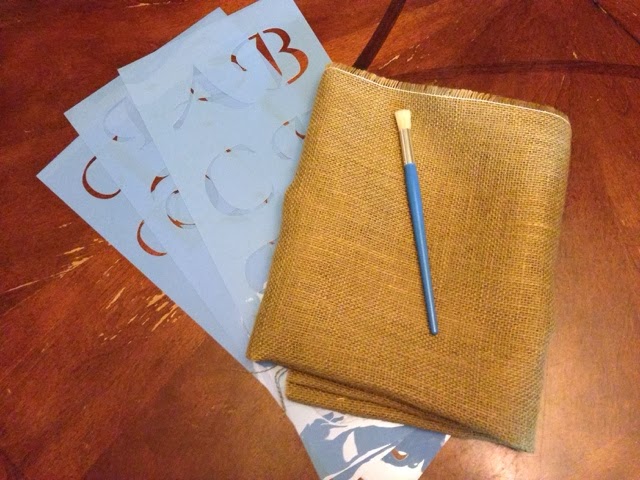

Ta-da! I would like to possibly add some colorful ribbon between the letters, but this will do for this year. I made a template in Pages and traced around it on the burlap. Cut out the pieces. Stenciled on the letters. Hot glued the twine on back. It's really handy having a reclaimed piano thingy as a mantel because it has these knobs that made it super easy to attach the banner. 


I don't really know how I feel about scarecrows, but this guy was another $2 thrift store find…so, why not?


Here's the whole picture. I'd like to add something to the wreath (next year). The milk can at the bottom is a family heirloom, filled with wheat from the family farm. Score. 


And then there's, Tom. I grabbed him for under $9 during Scentsy's Monster Monday Sale. You can grab yourself one by clicking here! 


Now, I should really go sleep before heading into work this evening. Hope everyone has a Happy Hump Day!

Friday, June 14, 2013

Game Day Burlap & Ribbon Wreath

I got a little crafty last week and made this wreath. My inspiration came from Etsy via Pinterest and retails for $65. I was able to make it for about $25 and had ribbon leftover. Just hit up Hobby Lobby when all the ribbon is 50% off. It was really pretty easy. I think it turned out pretty well, except for the horrid shade of orange and the phrase "hook 'em" which makes me gag a little. The family loves their burnt orange & Longhorns. I do not. will one day have my own, made with crimson & cream...Boomer Sooner! 

Supplies:

  • Wire wreath frame 
  • Burlap ribbon (I like the wired kind)
  • Wide ribbon for hanging
  • Accent ribbon of choice 
  • Small wooden plaque thing (they come in packs of 2 at Hobby Lobby)
  • Wooden football
  • Acrylic paint of choice
  • Scissors
  • Paintbrushes
  • Good glue
  • Stapler 

Process:

  • Weave the burlap ribbon in-and-out of the wreath frame. Don't worry about making it super tight. 
  • Cut pieces of accent ribbon and tie them on. As many as you want. There's really no technical way of doing it. 
  • For the football, I used a Sharpie to write with and used paint to do the circle things around the edge (kind of hard to see in the pic).
  • For the rectangle, I painted it my main color. Then I used white paint for the letters, which have little black paint accents and burnt orange polka dots. I basically just free-handed it.
  • I used Gorilla glue to attach the football to the rectangle. 
  • I tied a wide white ribbon through the back of the wreath frame, leaving a loop at the top for hanging and a little extra hanging out the bottom.
  • I used a normal stapler to attach the sign to the ribbon. 

Ta-da! 


Friday, July 13, 2012

New Fan

Ever since we moved in, we needed (maybe wanted) a new ceiling fan.  The original was an ugly white with awful brass accents.  To update and save money, we spray painted the fan and blades, replaced the brass blade attachments with brushed nickel, and changed out the ugly light things.  That worked well until recently.  We started to notice that the lights were burning out faster.  And there was one socket (I guess that's what you'd call it) that was particularly difficult to deal with when changing the light bulb.  A couple weekends ago, the brother went to change that light again.  This time, the base of the light bulb with the thread got stuck in the socket.  Seeing as how the living room needs more lighting anyway, only using the 2 remaining lights wasn't going to work.  Luckily, Lowe's happened to have their Hunter ceiling fans 20% off.  So we picked one out (it's suppose to be a 5-minute fan....power to whoever can do that in five minutes) and the next day, the brother and I got it installed.  I've done lights and a ceiling fan by myself before, but considering the height and everything, and second set of hands was really helpful.  The brother is also much taller.  Now, we have a fan with 4 lights that is very efficient at cooling and quiet, and not so much of a dust collector.  Fantastic!

Before

After (Yes the downrod is much shorter, but it actually works out well.  The brother was having some issues getting his hand hit by the blades during P90X-2.  That's what he gets for being stinking tall.)
   

Thursday, July 12, 2012

The Easiest Burlap Wreath...EVER!

Ever since I got hooked on Pinterest, I have wanted to make a wreath.  If you don't already know this, Pinterest has LOTS of great ideas for wreaths and tutorials on how to make them.  We have an old window on our mantel, which dons ornaments in all the panes at Christmas, but has nothing going on the rest of the year.  I decided I'd to burlap since it's pretty neutral and can be dressed up embellishments.  As I was looking for some kind of tutorial I kept running into ones where you cut lots of little burlap squares, fold them just right, and pin them just right on to a foam wreath.  While I'm probably capable of doing this, it was a bit too tedious for my taste.  Then, I found a great idea from Top This Top That.  All you really need is a metal wreath form and burlap ribbon.  Genius.  It took me a couple of minutes to figure out what I was doing.  Once I got in the groove, it was smooth sailing.  I ended up using a couple different weaves of burlap, which you can see in the picture.  I like it because it gives it a little more texture without screaming at you.  I plan to add some kind of embellishment, some color, but I haven't figured out what yet!  Any ideas?